php:修改session儲存路徑(使用ubuntu)
檔案在/etc/php5/apache2/php.ini
session.save_path = "/srv/session/zhuoyii-www"
參考文章:
http://php.net/manual/en/function.session-save-path.php
檔案在/etc/php5/apache2/php.ini
session.save_path = "/srv/session/zhuoyii-www"
參考文章:
http://php.net/manual/en/function.session-save-path.php
因為namespace的關係,所以如果要new某個global class,需要加入以下程式碼:
class className extends className {}
<IfModule mod_rewrite.c>
RewriteEngine On
RewriteCond %{REQUEST_FILENAME} !-f
RewriteRule ^ index.php [L]
</IfModule>
步驟如上。這時輸入網址,應該可以將原本的domain.com/index.php去掉,只要domain.com/ 就可以執行index.php了。
php.ini的預設路徑為:
/etc/php5/apache2/php.ini
修改下列設定:
upload_max_filesize = 10M
原本預設為 2M。
使用步驟如下:
1.安裝bake
composer require --dev cakephp/bake:~1.0
參考文章:http://book.cakephp.org/3.0/en/bake.html
2.修改權限
如果遇到Permission denied的問題,要修改權限。
chmod 755 bin/cake
cakephp的版本號,可以在以下目錄找到:
vendorcakephpcakephpVERSION.txt
以前安裝cakephp,都是下載.zip檔,但現在有改,安裝3.*步驟如下:
1.安裝composer
2.輸入以下指令:
composer create-project --prefer-dist cakephp/app [app_name]
安裝完後進去目錄裡面,會發現檔案都幫你下載好了,這時可以進去composer.json裡面,看你到底安裝了哪些東西。
3.增加app目錄下的.htaccess
參考cakephp官網。
4.增加webroot目錄下的.htaccess
參考cakephp官網。
以上步驟,應該安裝得差不多了,剩下的就是config裡面的db設定,這就自行設定了。
以下是使用AWS SES的步驟:
1.進入AWS CONSOLE,我個人選US East (N. Virginia),EC2則選東京。
2.進入SES後,點選Domain,然後會要你到Route53填一串TXT,填好即可。
3.點選Email Addresses,然後將你在Workmail使用的email填寫進來。Workmail怎麼用可以參考這篇文章。
4.之後點選smtp setting,之後download credentials,會有smtp user 跟smtp secret。
5.一開始使用SES,都是在sandbox運作,也就是要經過認證的信箱才能被寄送,這可以到Support center去寫個信即可跳離sandbox模式。
6.用composer安裝好phpmailer。
7.寫code。
<?php
require 'PHPMailerAutoload.php';
$mail = new PHPMailer;
//$mail->SMTPDebug = 3;                               // Enable verbose debug output

$mail->isSMTP();                                      // Set mailer to use SMTP
$mail->Host = 'smtp1.example.com;smtp2.example.com';  // Specify main and backup SMTP servers
$mail->SMTPAuth = true;                               // Enable SMTP authentication
$mail->Username = 'user@example.com';                 // SMTP username (就是SES smtp username)
$mail->Password = 'secret';                           // SMTP password(SES smtp password)
$mail->SMTPSecure = 'ssl';                            // Enable TLS encryption, `ssl` also accepted
$mail->Port = 465;                                    // TCP port to connect to

$mail->setFrom('from@example.com', 'Mailer');
$mail->addAddress('joe@example.net', 'Joe User');     // Add a recipient
$mail->addAddress('ellen@example.com');               // Name is optional
$mail->addReplyTo('info@example.com', 'Information');
$mail->addCC('cc@example.com');
$mail->addBCC('bcc@example.com');

$mail->addAttachment('/var/tmp/file.tar.gz');         // Add attachments
$mail->addAttachment('/tmp/image.jpg', 'new.jpg');    // Optional name
$mail->isHTML(true);                                  // Set email format to HTML

$mail->Subject = 'Here is the subject';
$mail->Body    = 'This is the HTML message body in bold!';
$mail->AltBody = 'This is the body in plain text for non-HTML mail clients';

if(!$mail->send()) {
    echo 'Message could not be sent.';
    echo 'Mailer Error: ' . $mail->ErrorInfo;
} else {
    echo 'Message has been sent';
}
以上應該已經可以成功寄信囉。然後記得EC2的機器Security group outbound 要打開,否則會連不上amazon的smtp。
今天突然遇到了以下問題,這是在使用facebook “php-sdk-v5:~5.*”時遇到的問題。
Failed to connect to 2a03:2880:11:1f04:face:b00c:0:1: Network is unreachable
主要的原因是facebook php sdk會使用curl,google了很久以為是ipv6無法解析的原因,但把ipv6關掉也無法解決。
最後才發現是aws security group的問題,outbound要把port443打開,curl會用到。
做點筆記。
以下是使用AWS服務的workmail步驟,如果你自己註冊網域,但又不想自己搞SMTP,可以直接用AWS的email服務,它的價格是每個月四美金,使用一個email帳戶。
步驟如下:
1.登入Console,然後進到WORKMAIL
2.add organization,之後會要你填alias,那就是你之後登入會用到的網址。
例如https://alias.awsapps.com/mail
3.設好之後,可以點進去,之後會進到以下畫面,然後點user,新增一個使用者。
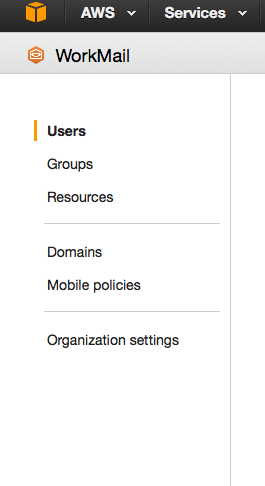
4.新增完使用者之後,點選domails,填入你註冊的網址。
5.設定route53
填完你的domail後,它會要你設定一條MX record、一條TXT record,四條CNAME紀錄。
設定完Route53,再到第二個步驟的網址,你應該已經可以登入用Workmail了。
參考文章:
https://docs.aws.amazon.com/workmail/latest/userguide/using_web_application.html